Using tags to organize your Overleaf projects
It’s easy to organize your Overleaf projects using tags. These tags are personal to you (your collaborators won’t see them) and you can use as many as you like in whatever combination you like. Below you’ll find step-by-step instructions for using tags on your projects.
- Note: To add tags to a project, use a desktop, laptop, or tablet device. Mobile phones are not currently supported for this feature.
Creating a new tag
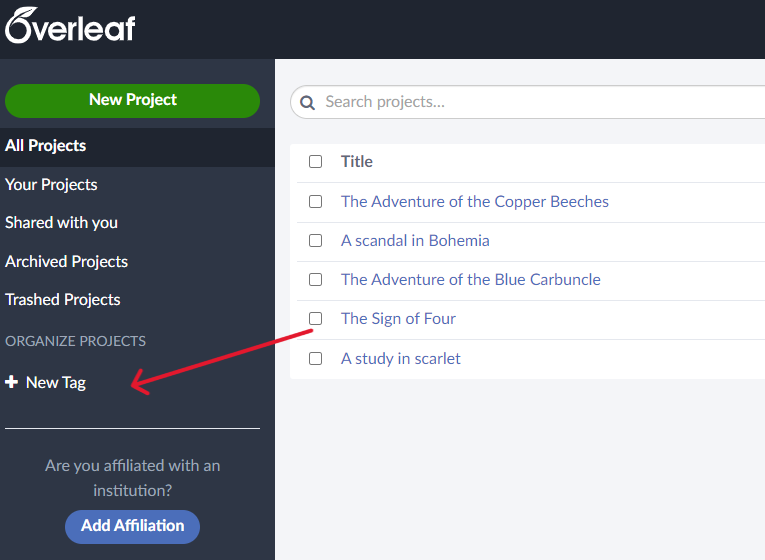
- In your project dashboard, click on New Tag (bottom left)
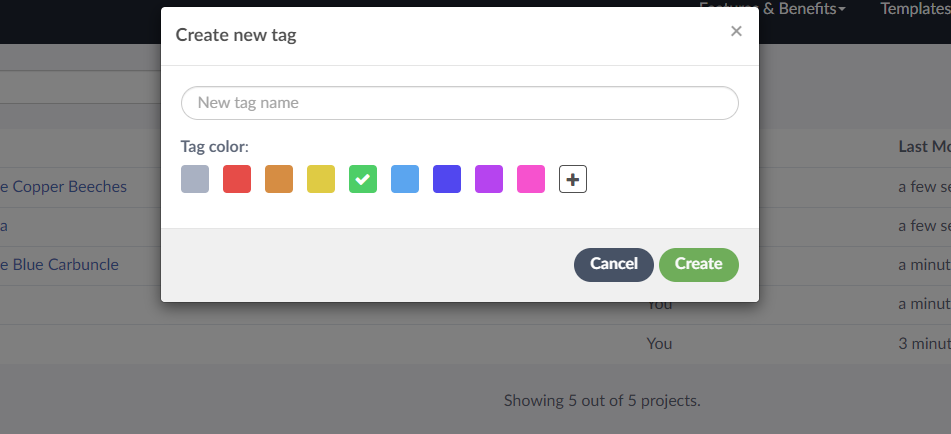
- Enter a name for your new tag
- This can be anything you want – just make sure it’s unique and you haven’t used it before.
- Pick a tag color
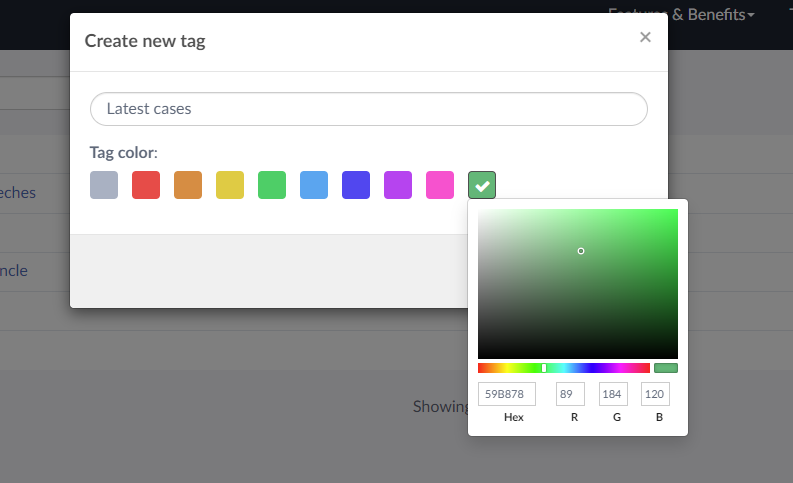
- This will help you quickly spot and identify your tags. You can choose from our nine preset colors or create your own by using the color map or entering the HEX or RGB values (as shown below).
- Click Create
- And there you have it – a new tag.
Adding tags to your projects
To add a tag (or tags) to your projects, simply follow the steps below.
- In your project dashboard, tick the box next to the Title of the project(s) you’d like to tag.
- Click the Tag icon above the project list (as shown above).
- Select the tag(s) you want to add to the project(s).
- You can have multiple tags on a project if you wish.

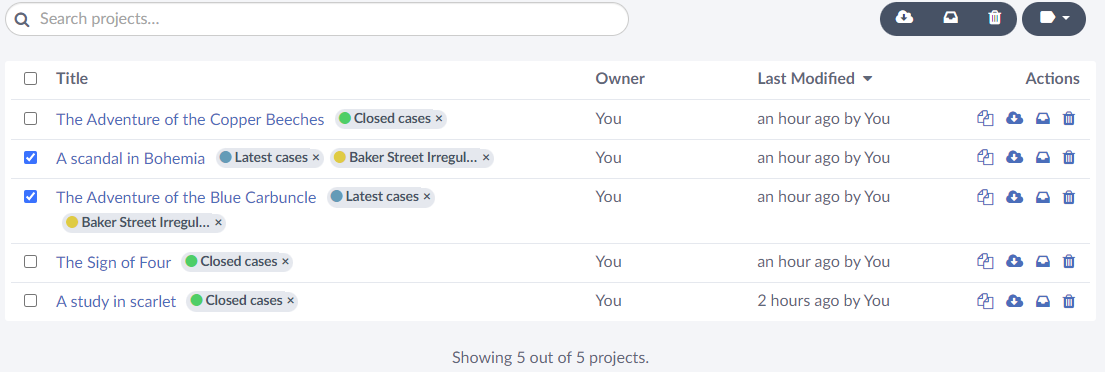
And you’re done – the project(s) you’ve selected will be all tagged up.
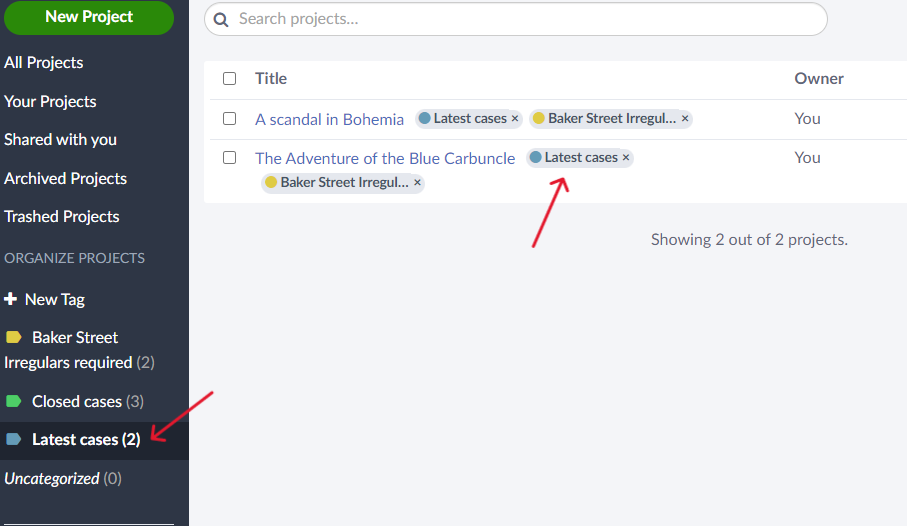
Viewing projects with a specific tag
Once you’ve tagged your projects, you can easily view all the projects with a specific tag in your project dashboard.
To do this, you can either:
- Click the tag name in the bottom left of your project dashboard.
OR
- Click the tag name next to the Title of your project.
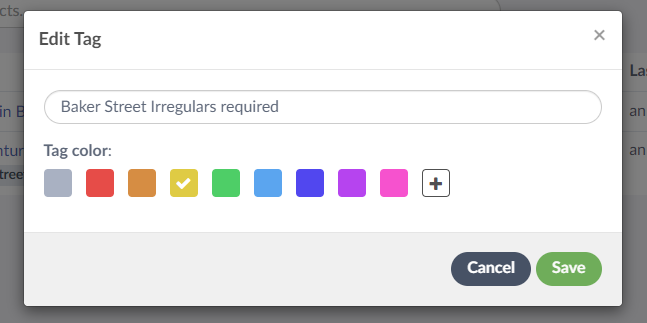
Changing the name or color of a tag
It’s easy to change the name or color of your tag at any time. This won’t affect which projects you’ve tagged, just the name/color.
- In your list of tags (bottom left of your project dashboard), hover over the tag you wish to edit and click the drop-down arrow.
- Click Edit
- You can then follow the steps shown in the Creating a new tag section above to change the name and/or color of your tag.
- Click Save
- Your changes will be saved and renamed tag will appear on the projects it was already attached to.
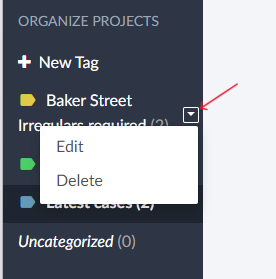
Deleting a tag
If you no longer need a tag, you can delete it. This won’t delete the projects under this tag, just the tag itself. The tag will be removed from the Tags list and it will no longer appear next to the project Titles it was attached to.
- In your list of tags (bottom left of your project dashboard), hover over the tag you wish to delete and click the drop-down arrow.
- Click Delete
- You will be asked if you’re sure you want to delete the tag. If you are, click Delete.
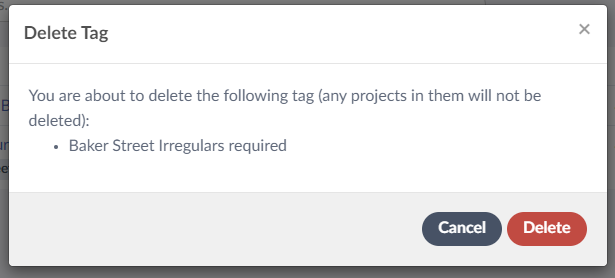
And you’re done. The tag is deleted.